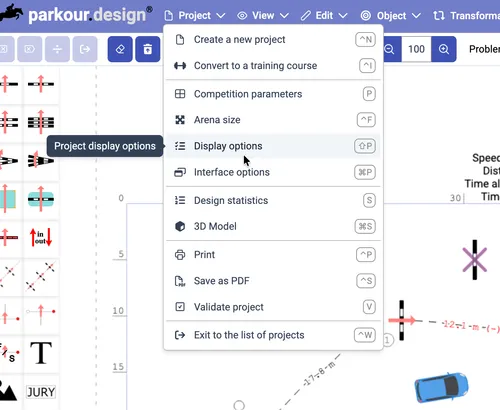
Display options
Use Display Options to customise how the design in visible in the editor. From the Project menu choose Display options command or press the default keyboard shortcut Shift-P.
Saving options
Any change to the default Display Options is saved together with the design and affects that design only.
In order to save the current options as your default set that will be used for any subsequent new design, use the menu in the left bottom of the dialog - press the arrow to unfold more commands and choose Save current settings in my profile. From that moment, the new designs will be created using the saved set of options.
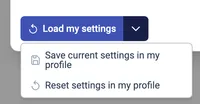
If you want to apply the saved options to an exisiting design, open it and its display options and use the button Load my settings. The saved options will be loaded and applied to the current design.
If you want to reset the saved options to the default set defined by the application, unfold the previously mentioned menu and press Reset settings in my profile. This will reset your saved options to the default set. You can then apply these default options to the design pressing Load my settings button.
General options
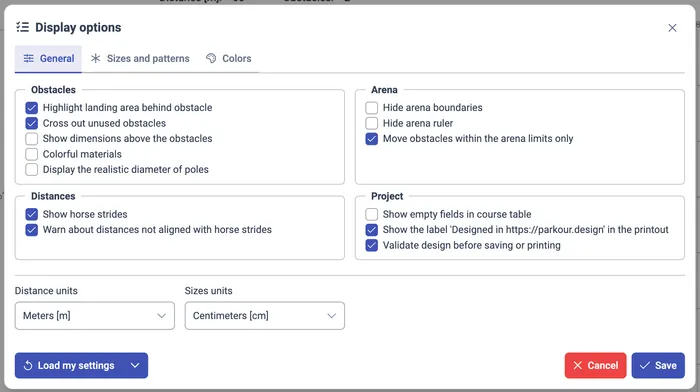
Obstacles
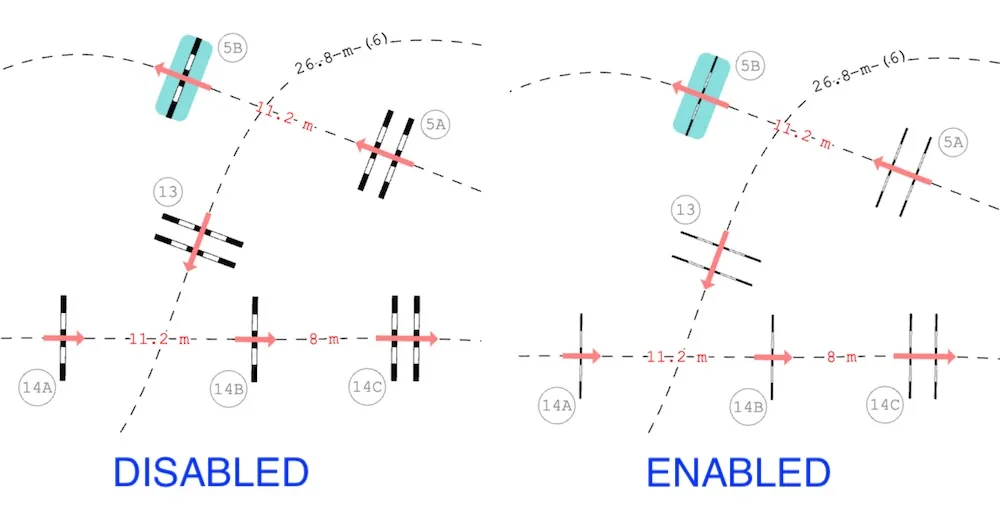
Highlight landing area behind obstacle
When enabled, on a selected obstacle, the area in the front of the obstacle becomes highlighted. This allow for spotting any collisions with objects in the arena after the horse lands behind the obstacle. Default - enabled.
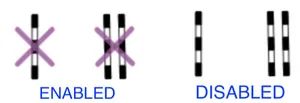
Cross out unused obstacles
When enabled, the obstacles that are not part of the course, but are on the arena, are crossed-out with a purple cross. Disable this option to get rid of the cross. Default - enabled.
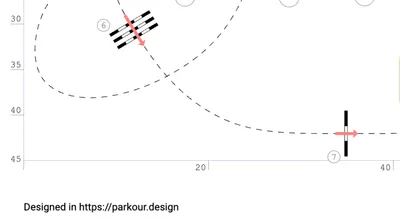
Show dimensions above the obstacles
When enabled, obstacle dimensions are displayed above the obstacle symbol. Default - disabled.
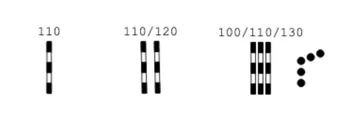
The dimensions have the following meaning:
- Single value (for example 110): obstacle height for verticals
- Double value (for example 110/120): obstacle height / spread for oxers and triple-bars
- Triple value (for example 110/120/130): obstacle height / maximum height / spread for oxers and triple-bars, where in the materials editor the last bar of the obstacle is raised
Colorful materials
When enabled, obstacle materials that are defined in the materials editor will be colored, otherwise they will be black and white. Default - disabled.
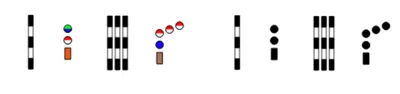
Display the realistic diameter of poles
The poles/bars used in obstacles are assumed to have a diameter of 10 cm. This value is always used for calculations of distances and spreads. On the plan, drawing such poles would result in unproportionally thin obstacles (like needles), so they are drawn by default as if their diameter was 30 cm. That can lead to some small inaccuracies when measuring the distances manually with the tape measure.
When enabled, the poles will be displayed using theire realistic diameter 10 cm instead of 30 cm. Default - disabled.
Distances
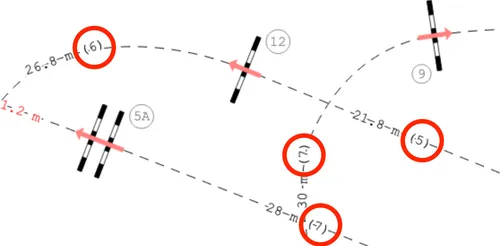
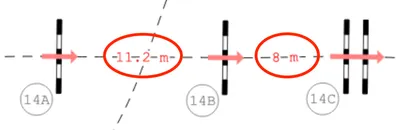
Show horse strides
When enabled, number of strides is displayed next to the distance between the obstacles. Default - enabled.
The number of strides is calculated based on the Competition parameters:
- Length of jump before an obstacle
- Length of landing behind an obstacle
- Minimal stride length
- Maximal stride length
If the number of strides presented differs from your experience or you design for non-standard horses, like ponies, adjust these parameters first. That will result in more appropriate number of strides calculated for distances between the obstacles.
Warn about distances not aligned with horse strides
When enabled, the distance between the obstacles will be drawn in red and a warning will be added to the course validation, when the application detects that according to the configured competition parameters, there is no possibility for the horse to cover the distance. Refer to the description of Show horse strides above, for the list of parameters that affect this decision.
If you are getting warnings for distances which in your opinion should be possible to cover by the horse, please adjust the aforementioned parameters in the Competition parameters to match your situation.
Arena
Hide arena boundaries
When enabled, the rectangle indicating the boundaries of the arena, as defined by the arena size, will be not visible. Default - disabled.
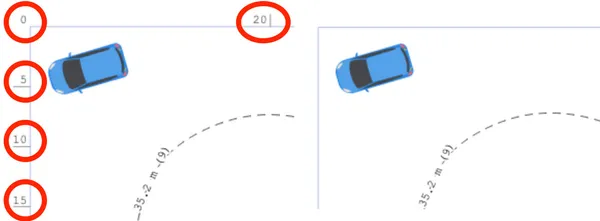
Hide arena ruler
When enabled, the marks indicating the arena size, will not be visible. Default - disabled.
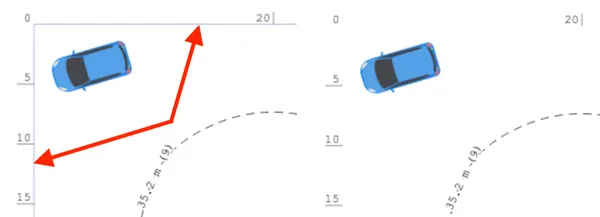
Move obstacles within the arena limits only
When enabled, when moving the obstacles, it will not be possible to place them outside of the arena rectangle. Disable this option when you find this inconvenient. Default - enabled.
Project
Show empty fields in course table
When enabled, the table with the course details will display the fields which are empty, otherwise such fields will be hidden. Default - disabled.

Show the label ‘Designed in https://parkour.design’ in the printout
When enabled, there will be an attribution label added to each design below the arena on the printouts and PDFs. Default - enabled. You can disable this option only if you have the Masters subscription plan.
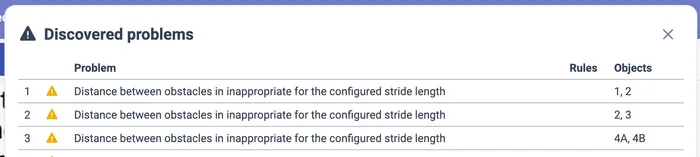
Validate design before saving or printing
When enabled, the application will notify you before every attempt to print or save the design as PDF, if the validation discovered any errors or warnings. Default - enabled.
Units
Distance units / sizes units
You can choose the units in which you design separately for distances and dimensions. Please consult working with metric or feet units page for details.
Sizes and patterns options
On this tab you can choose the style of various graphics elements of the design.
Font sizes
The font sizes are provided as a percentage of the default size. Increase the number for larger font, decrease for smaller.

| Obstacle numbers [%] | Numbers / labels of obstacles on the course | 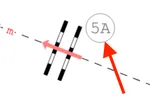 |
| Table [%] | Table with course parameters | 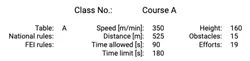 |
| Distances [%] | Distances between obstacles |  |
| Arena ruler [%] | Arena size markers | 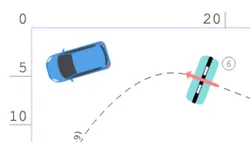 |
| Other [%] | Start, finish, obstacle names and others | 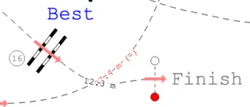 |
Course

| Pattern in round 1 | Drawing pattern of the course path in the primary round or phase | 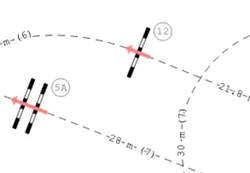 |
| Pattern in round 2 | Drawing pattern of the course path in the secondary round, jump-off or second phase | 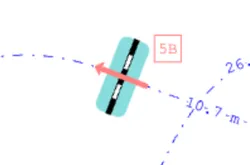 |
| Pattern in round 3 | Drawing pattern of the course path in the second jump-off or first jump-off after second round or phase | 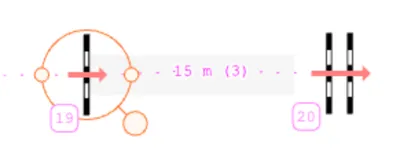 |
| Pattern out of rounds | Drawing pattern of the course path in sections not connected to any of the rounds | 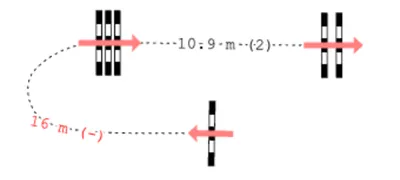 |
| Width [pixels] | Width of the line of any course path | 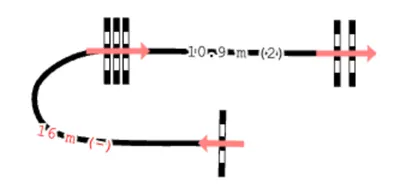 |
Distances

The distance between the obstacles will be displayed on the course path only if it falls in the range defined here (between minumum and maximum). The default is that all distances will be displayed if there is enough space (minumum set to zero and maximum to infinity).
Others

| Arena frame rounding | Rounding of the corners of the arena boundary rectangle |  |
| Paper sheet margins [cm] | The margins between the design content and the edges of the print page. The margin is visible as the distance to the outmost dashed rectangle representing the page sheet. |  |
| Line width [pixels] | Line width of obstacle elements, number shapes, arena boundary, obstacle crossings, etc. | 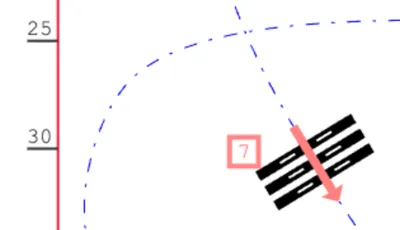 |
| Tape measure width [pixels] | Line width of the tape measure | 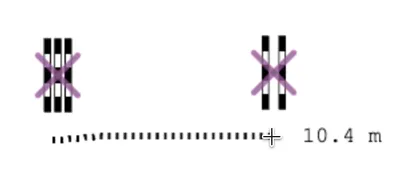 |
| Tape measure pattern | Line pattern of the tape measure | 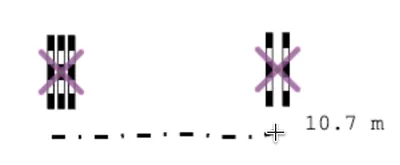 |
| Grid size [m] | Distance between lines of the grid (enabled through menu View→Show grid) | 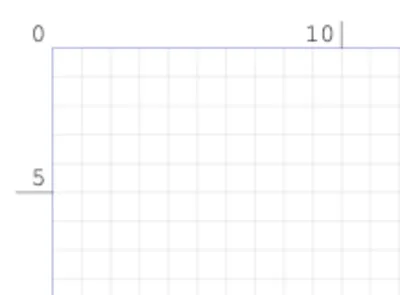 |
Colors options
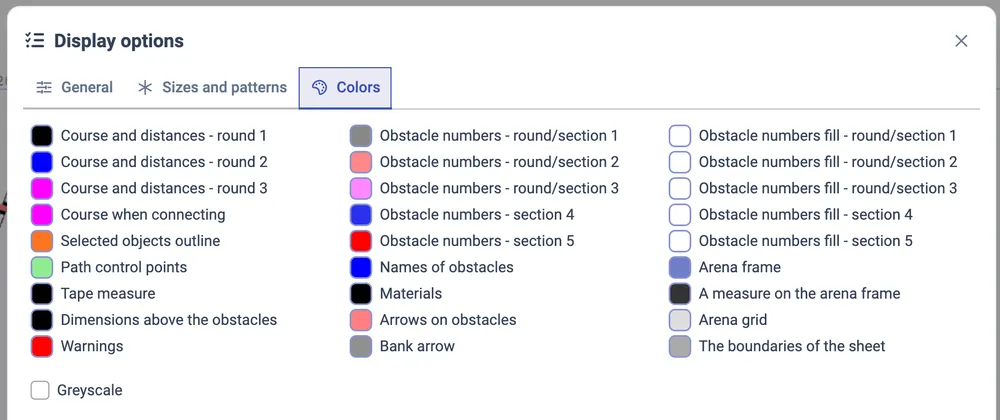
| Course and distances - round 1, 2, 3 | The color of the course path line and the distances between obstacles displayed on the line, in various rounds. |
| Course when connecting | The color of the course path line when connecting obstacles using keyboard. |
| Selected objects outline | The color of the circle or rectangle around objects that are currently selected. |
| Path control points | The color of the circles used to drag the course path during shaping the path. |
| Tape measure | The color of the tape measure tool. |
| Dimensions above the obstacles | The color of the dimensions displayed above the obstacles (see section above General / Obstacles / Display dimensions above the obstacles). |
| Warnings | The color of the distances and strides displayed on the course path, when warning about their misalignment with the horse stride range. |
| Obstacle numbers - round/section 1, 2, 3 or section 4, 5 | The color of the line and font of obstacle numbers in various rounds (competition) or in various sections (trainings). In a training has more than five sections, the colors will repeat cyclically. |
| Names of obstacles | The color of the name assigned to an obstacle by the user in the object panel. |
| Materials | The color of the materials on the plan in case colorful materials are disabled. |
| Arrows on obstacles | The color of the arrows displayed on obstacles connected to the course. |
| Bank arrow | The color of the arrow displayed on the bank obstacle. |
| Obstacle numbers fill - round/section 1, 2, 3 or section 4, 5 | The color of the interior (fill) of obstacle numbers in various rounds (competition) or in various sections (trainings). In a training has more than five sections, the colors will repeat cyclically. |
| Arena frame | The color of the rectangle of the arena boundary. |
| A measure on the arena frame | The color of the ruler markings on the arena boundary. |
| Arena grid | The color of the grid lines, when grid is enabled. |
| The boundaries of the sheet | The color of the dashed outer rectangle limiting the print page sheet. |
You can remove the colors from the editor and work in monochrome / grayscale by selecting a checkbox Greyscale