Using the Control Panel
The Control Panel is on the right side of the editor. Use it to review your course, organize objects, and edit the selected object without leaving the arena view.
It has two sections:
- The Lists Panel at the top contains tabs for managing the Course, Objects, Groups, Designs, and Images.
- The Object Panel at the bottom displays the settings for the object currently selected in the arena. It is hidden when no object is selected.
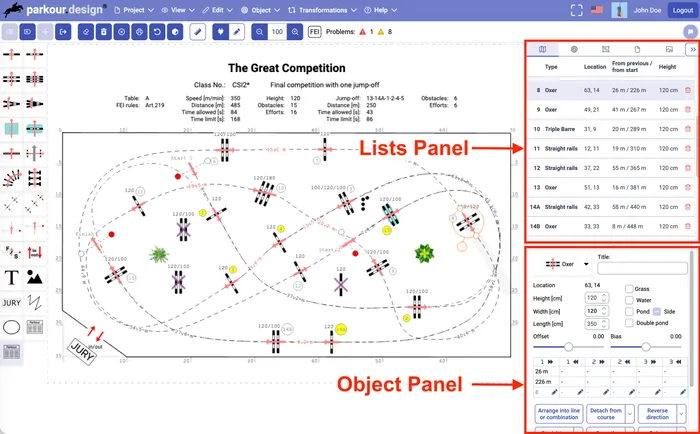
Lists Panel
Use the tabs in the Lists Panel to move between different parts of your design:
- Course shows the obstacles connected to the course, organized by round and section, together with their basic parameters.
- Objects shows objects that are not connected to the course. You can review their drawing order and rearrange them.
- Groups shows the groups of objects in the current design.
- Designs lets you quickly switch between designs.
- Images contains built-in and imported images that you can add to the design.
Course tab
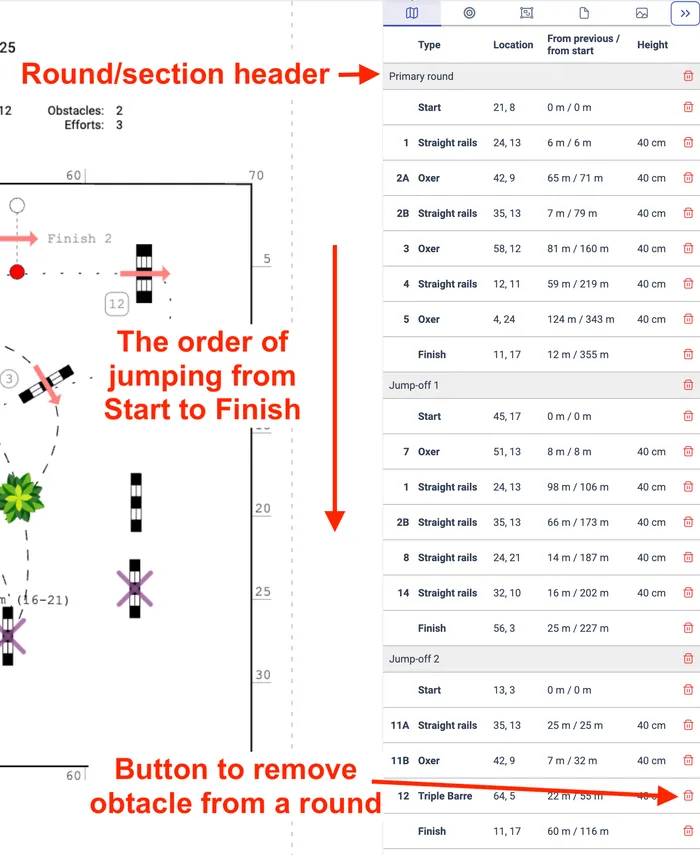
The Course tab lists all obstacles that are connected to the course, meaning they are joined by a course track. Entries appear in jumping order, from Start to Finish.
If an obstacle is jumped more than once, it appears in a separate row for each occurrence. Selecting the obstacle in the arena highlights all of its entries in the table. Selecting a table row works in the other direction: it selects the corresponding obstacle on the course plan.
Gray headers separate the rounds and sections. Each entry also shows its position in the arena, the distance from the previous obstacle, and the distance from the start of the round or section.
This tab is especially helpful when checking a complex course in which obstacles are used in several rounds. It gives you a clear overview of the jumping order without having to trace every track on the arena drawing.
To remove an obstacle from a specific round or section, click the red trash icon in its row. This removes only that occurrence from the course; the obstacle remains in any other rounds or sections where it is used.
Objects tab
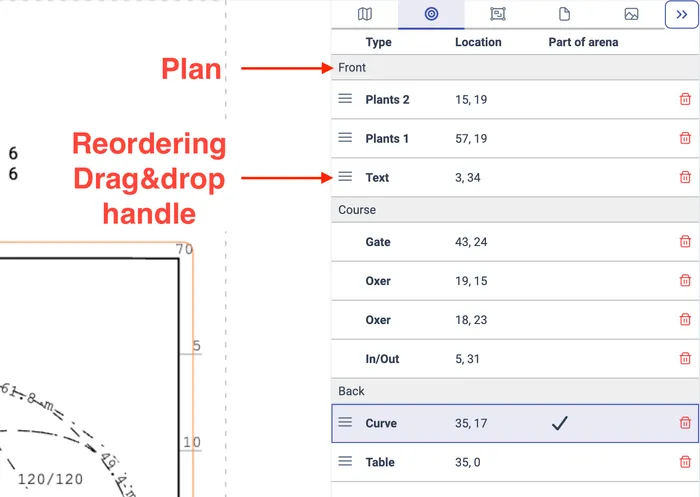
The Objects tab lists every object that is not connected to the course and therefore does not appear on the Course tab. Objects are divided among three drawing planes:
- Front contains objects in front of the course.
- Course contains objects on the same plane as the course but not on the track, for example, In/Out markers or unused obstacles.
- Back contains objects behind the course.
The order within each list controls how objects overlap on the course plan. Objects higher in the list are drawn on top of objects below them.
To change the drawing order, drag objects up or down within the Front or Back plane or between them. You can make the same adjustment with the Plan and Layer buttons in the Object Panel.
The Part of the arena column identifies objects that have been fixed as part of the arena. These objects behave like a background: you cannot select or move them directly on the course plan. To work with one, select it from the Objects tab.
To remove an object from the design, click the trash icon in its row.
Groups tab
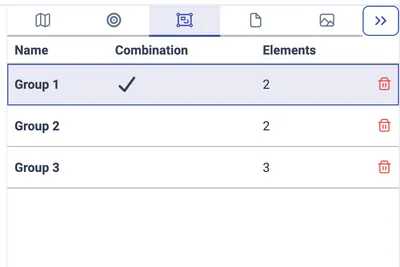
The Groups tab lists all groups of objects in the current design.
The Combination column shows which groups form combination obstacles. This is determined automatically from the alignment of the obstacles in each group.
To delete a group and every object it contains, click the trash icon in its row.
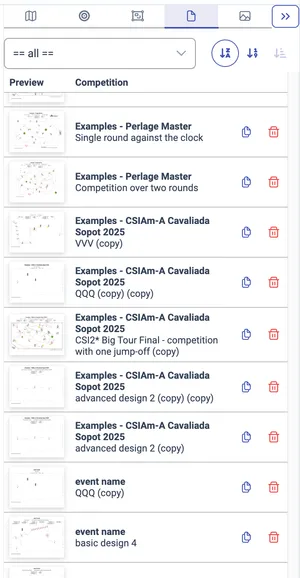
Designs tab
The Designs tab gives you access to your designs without leaving the editor. It works similarly to the list on the Your Projects page.
Use the dropdown list to select an Event and display its designs. Hover over a thumbnail to see a larger preview. The currently open design is highlighted, and the two icons next to each design let you clone or delete it.
Click any row to open that design in the editor. The list stays open and keeps its current selection, making it easy to review several designs in succession.
Images tab
The Images tab contains the built-in images and any images you have imported. From here, you can add them to the current design and manage your image collection. For detailed instructions, see Working with images.